Tuesday, May 4, 2010
Monday, May 3, 2010
Final Documentation: Storyboard

Here is my original storyboard for the final. During the production of the video, some things were changed and/or added. Instead of shaking his fist, the hand does a "thumbs down" motion. In addition, I added "lights" for the pinball machine.
Final Documentation: Self-Evaluation
Much like the midterm, I am satisfied with what I was able to accomplish but I wish I could have done more. I think the pinball machine looks much more authentic now, which was one of my main goals. In addition, I think the Pong machine, while simple, makes the video a lot more visually appealing overall. I also like the bright lighting as opposed to the darkness of my midterm video. When I finished my midterm I was considering using dynamics to make the pinball motion more fluid, but as I progressed on the other elements of the project, I soon realized that adding dynamics would be too ambitious. Also, If I had more time, I would have smoothed out the pinball animation on the rails as well. As it is, I think its passable but I wish it was a little better. Unfortunately, Maya has a bad habit of crashing at the worst possible times, and as a result I had to redo that part of the project more than once. Under my current time constraints, however, I felt I did a good job.
Final Documentation: Production Log
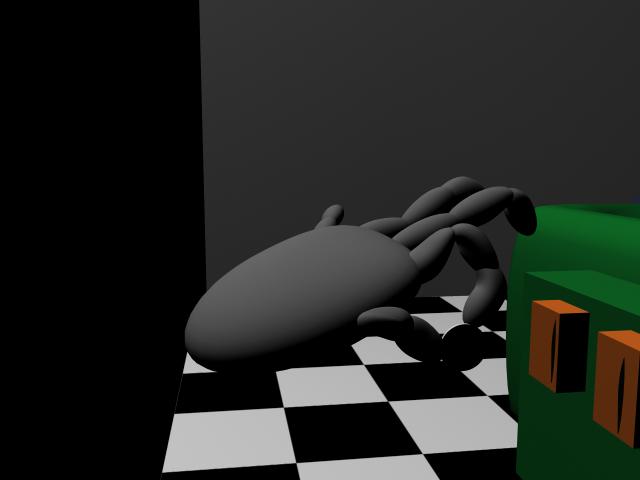
My first task was to create working hands. Originally, I had planned to create the hands using a NURBS sphere as the palm and cylinders as the fingers. However, I soon realized that using cylinders for the fingers made the hands look outright ugly. As a result, I decided to create the fingers out of spheres manipulated by CVs instead. The fingers are segmented at each joint, making it easy to implement the skeleton. The first time I designed the hand, the points on the skeleton were too close together and it led to several problems. As a result, I started from scratch and managed to get working hands. I manipulated the hands to put them in very specific positions. I wanted the motion of putting in the coin, pulling the plunger, and pushing the buttons to be somewhat realistic, so I manipulated most of the joints on each finger. In addition, I soon realized that I was unable to make a convincing fist due to the fingers being far apart from each other. Instead, I made a "thumbs down" motion with the hand, which worked well.


I made several changes to the actual pinball board. I made the red border on the side significantly smaller to give me more space. The two main additions were the metal ramps, which were made with cylinders. I manipulated each ramp so they would overlap each other in a way so the pinball could easily go over both ramps without running into one while going on the other. I added more NURBS planes to represent lights, which now change color when the pinball goes over them. I redesigned the bumpers to make them look closer to the bumpers on an actual pinball machine by lofting two NURBS circles.
The box in the original video has been replaced with a treasure chest, which I think looks nicer. In addition, the treasure chest opens up once the pinball hits it. I used Phong shaders to give the machine a more metallic feel. In addition, I added an area light in the center of the machine. I think the pinball in particular has a very nice metallic effect on it. When I rendered, I turned on raytracing to take adavantage of the high reflectivity on the shaders. I also added a semi-transparent plane on top to simulate plexiglass. Originally this was less transparent but I quickly realized that this caused the colors of the objects on the machine to look really washed out.


The Pong machine was probably the easiest part of the project overall. Much like the LED screen, I used small planes moving in front of a NURBS cube to create the illusion that the game is on the screen. The dot moved at about 15 frames per volley in order to ensure fluid movement. Ideally, I would have liked to simulated a more complex game like Space Invaders or Pac-Man but this was the best I could do in the interest of time.

By far the hardest part of the project was adding in more animation for the pinball to utilize the new ramps. I had to do a lot of copying and pasting keyframes in order to squeeze in the new animation, and it doesn't move as smoothly as I would like. However, I changed the camera to pan around the machine at this point which worked better than keeping the overheard cam and made the stilted movement of the pinball much harder to notice. The spanning camera view was also chosen because it shows that the models look good from several different angles. After rendering, I kept this shot because I really like how the view highlights the metallic shading on the pinball. Because it was hard enough to make the animation look believable with keyframes, I decided it would be too frustrating to try and add dynamics.
Unfortunately, I was unable to add sound. My plan was to add pinball style sound effects, and then a losing horn at the end. However, I spent over an hour trying to find public domain pinball sounds online, to no avail.
FInal Documentation: Proposal
For my final, I decided to create a more detailed version of my midterm. When I finished my midterm, I knew there was a lot more I could have added but I was unable to due to the interest of time. This time, I wanted to make the table more detailed, add better shaders, fix the lighting, and add more to the scene to make it a little less dull. I also decided I wanted to take a shot at rigging, so I modeled two hands that were each binded to a skeleton to operate the machine. My original plan was to have the hand put the coin into the machine, pull the plunger, and press the buttons on the paddles. In addition, one of the hands would shake its fist at the machine when it lost. In addition, I would have a Pong machine running in the background.
Tuesday, March 23, 2010
Midterm Documentation: Self-Evaluation
I put a significant amount of time and effort into this project, and I hope that it shows. Overall, I am pleased with how it turned out. I think the camera angles work well, and the LED screen came out as good as I had hoped. The only issue I really have with the animation is that I wish I could have given the pinball more realistic-looking motion. Animating with key frames definitely took a lot of work, but in the long run it was probably a better idea to do that than to use motion paths, which I'm not as familiar with. Next time I will also make an effort to try using more complex shaders and lighting. Considering that I have very little experience with Maya, I feel that I did a good job, though I always see ways I can improve my own work. Hopefully I will be able to implement more advanced techniques to adapt this project for the final. I think it could definitely benefit from adding special effects, better textures, and so on.
Midterm Documentation: Production Log
Modeling: The first thing I did when designing this project was search for various pictures of pinball machines online. I wanted to make sure my design appeared to be at least somewhat realistic. I used these pictures as reference for the placement of the various objects on the table, such and the bumpers and ramps.

While most of the models in this project were not terribly hard to make, my idea was to combine simple curves and surfaces to make something that appears more complex. My first goal was to create the actual machine, which involved creating curves with trimmed edges and then lofting them together, similar to the Jack-In-The-Box in the Maya tutorial book. I then created a planar surface to act as the base. The flippers and the barrier on the far-right of the machine were also created through lofting curves and adding a planar surface, which was then scaled to fit the size of the machine. The ramps were made by creating a NURBS rectangle, and then deleting the top and the bottom and manipulating CVs in order to curve the ramp. The bumpers and the plunger both consist of a series of parented cylinders. The slots on the top of the machine were made by horizontally scaling a cylinder and then duplicating it. I also added “stickers” to the center of the machine, which are really curved surfaces placed right on top of the pinball machine base in order to make the machine look less empty in the center. The spinner and the obstacle on the left were made with cylinders parented to rectangles. The coin is a simple cylinder, and the coin-slot is a curved plane.

Animation: Animating this scene was by far the hardest part of this project. I spent a large amount of time animating the pinball to make it move in a way that would seem plausible. As a result, I had to use well over 40 key frames. For the paddles, I attached each one to a small sphere that acted as a hinge for movement. The movement of the paddles generally took up six frames for each hit. Eventually I lowered the initial position of each paddle so there would be a larger range of movement. The bumpers were enlarged for one frame when hit by the pinball to make it appear they were buckling. I also had the pinball slide down the paddle at one point before being hit. The movement of the pinball and the paddle near the end of the animation is intentionally slow in order to highlight the frustration of missing the ball when it is impossible to hit.
For the LED Screen, the “lights” are actually circular planes that are shaded orange. All of the circles in each letter are parented. In order to create the illusion of the lights suddenly appearing onscreen, I put each letter behind the pinball machine and then moved each letter up to the screen within one frame so that it would appear to be instantaneous. Because the viewer cannot see the back of the machine, there is no way to know the letters are actually there the entire time.

Camera: This was my first time taking advantage of the camera in Maya, so I experimented with certain views. The initial shot focuses on the coin and the slot, which I felt was a good way to start the animation. It then moves to the plunger, and then the overheard view where the viewer is finally fully aware they are looking at a pinball machine. I moved the camera to the left when the pinball slows down for dramatic effect, and then I zoom in on the screen to give a clear view of the letters. I feel that these shots generally enhanced the animation.

Shading/Lighting: Since my focus on this project was primarily modeling and animation, the shading and lighting is intentionally basic. Most of the objects have Lambert shaders, while some have a Blinn shader in order to give the objects a metallic shine. The floor is a black and white checkered pattern. The lighting for the animation is a single standard spotlight. While testing the renders, I noticed the lighting appears to give the back of the machine a curved top. I liked this effect and as I result I kept it.

Midterm Documentation: Proposal
For this midterm, my main goal was to take advantage of my skills in Maya while improving on my animation, which I felt I needed more experience in. As a result, I decided not to use the project I had made to previously demonstrate techniques taught in class, which was a 3D representation of a Sonic the Hedgehog level. While I did enjoy working on that project, I felt that it did not achieve the goals I set for myself for this midterm since it was entirely modeling. Originally, my plan was to make an animation involving a bow and arrow. Ultimately, this project did not work out. Certain surfaces did not animate the way I wanted them to, and it generally seemed too simple and unimpressive. As a result, I started from scratch, with a new goal: a pinball machine. My proposal was to model a pinball machine, complete with animating pinball, flippers, obstacles, and an LED screen. A coin goes into the coin slot, the pinball bounces around the table, and then when the player loses, the words “TOO BAD” appear on the LED screen.
Monday, March 15, 2010
Subscribe to:
Comments (Atom)